Connecting your PAX Pin Pad to the Quickvee POS is easy — it only requires an Ethernet cable.
(No direct cable connection between the POS and Pin Pad is needed.)
1. Connect the Ethernet Cable to the Pin Pad 🌐
PAX Aries 8 Ethernet Connection Port
PAX A30 Ethernet Connection Port
PAX A35 Ethernet Connection Port
2. Connect the Other End of the Ethernet Cable to your Internet Switch/Modem🌐
3. Connect the Power Cable to a Wall Outlet or Power Strip⚡️
PAX Aries 8 Power Cable Port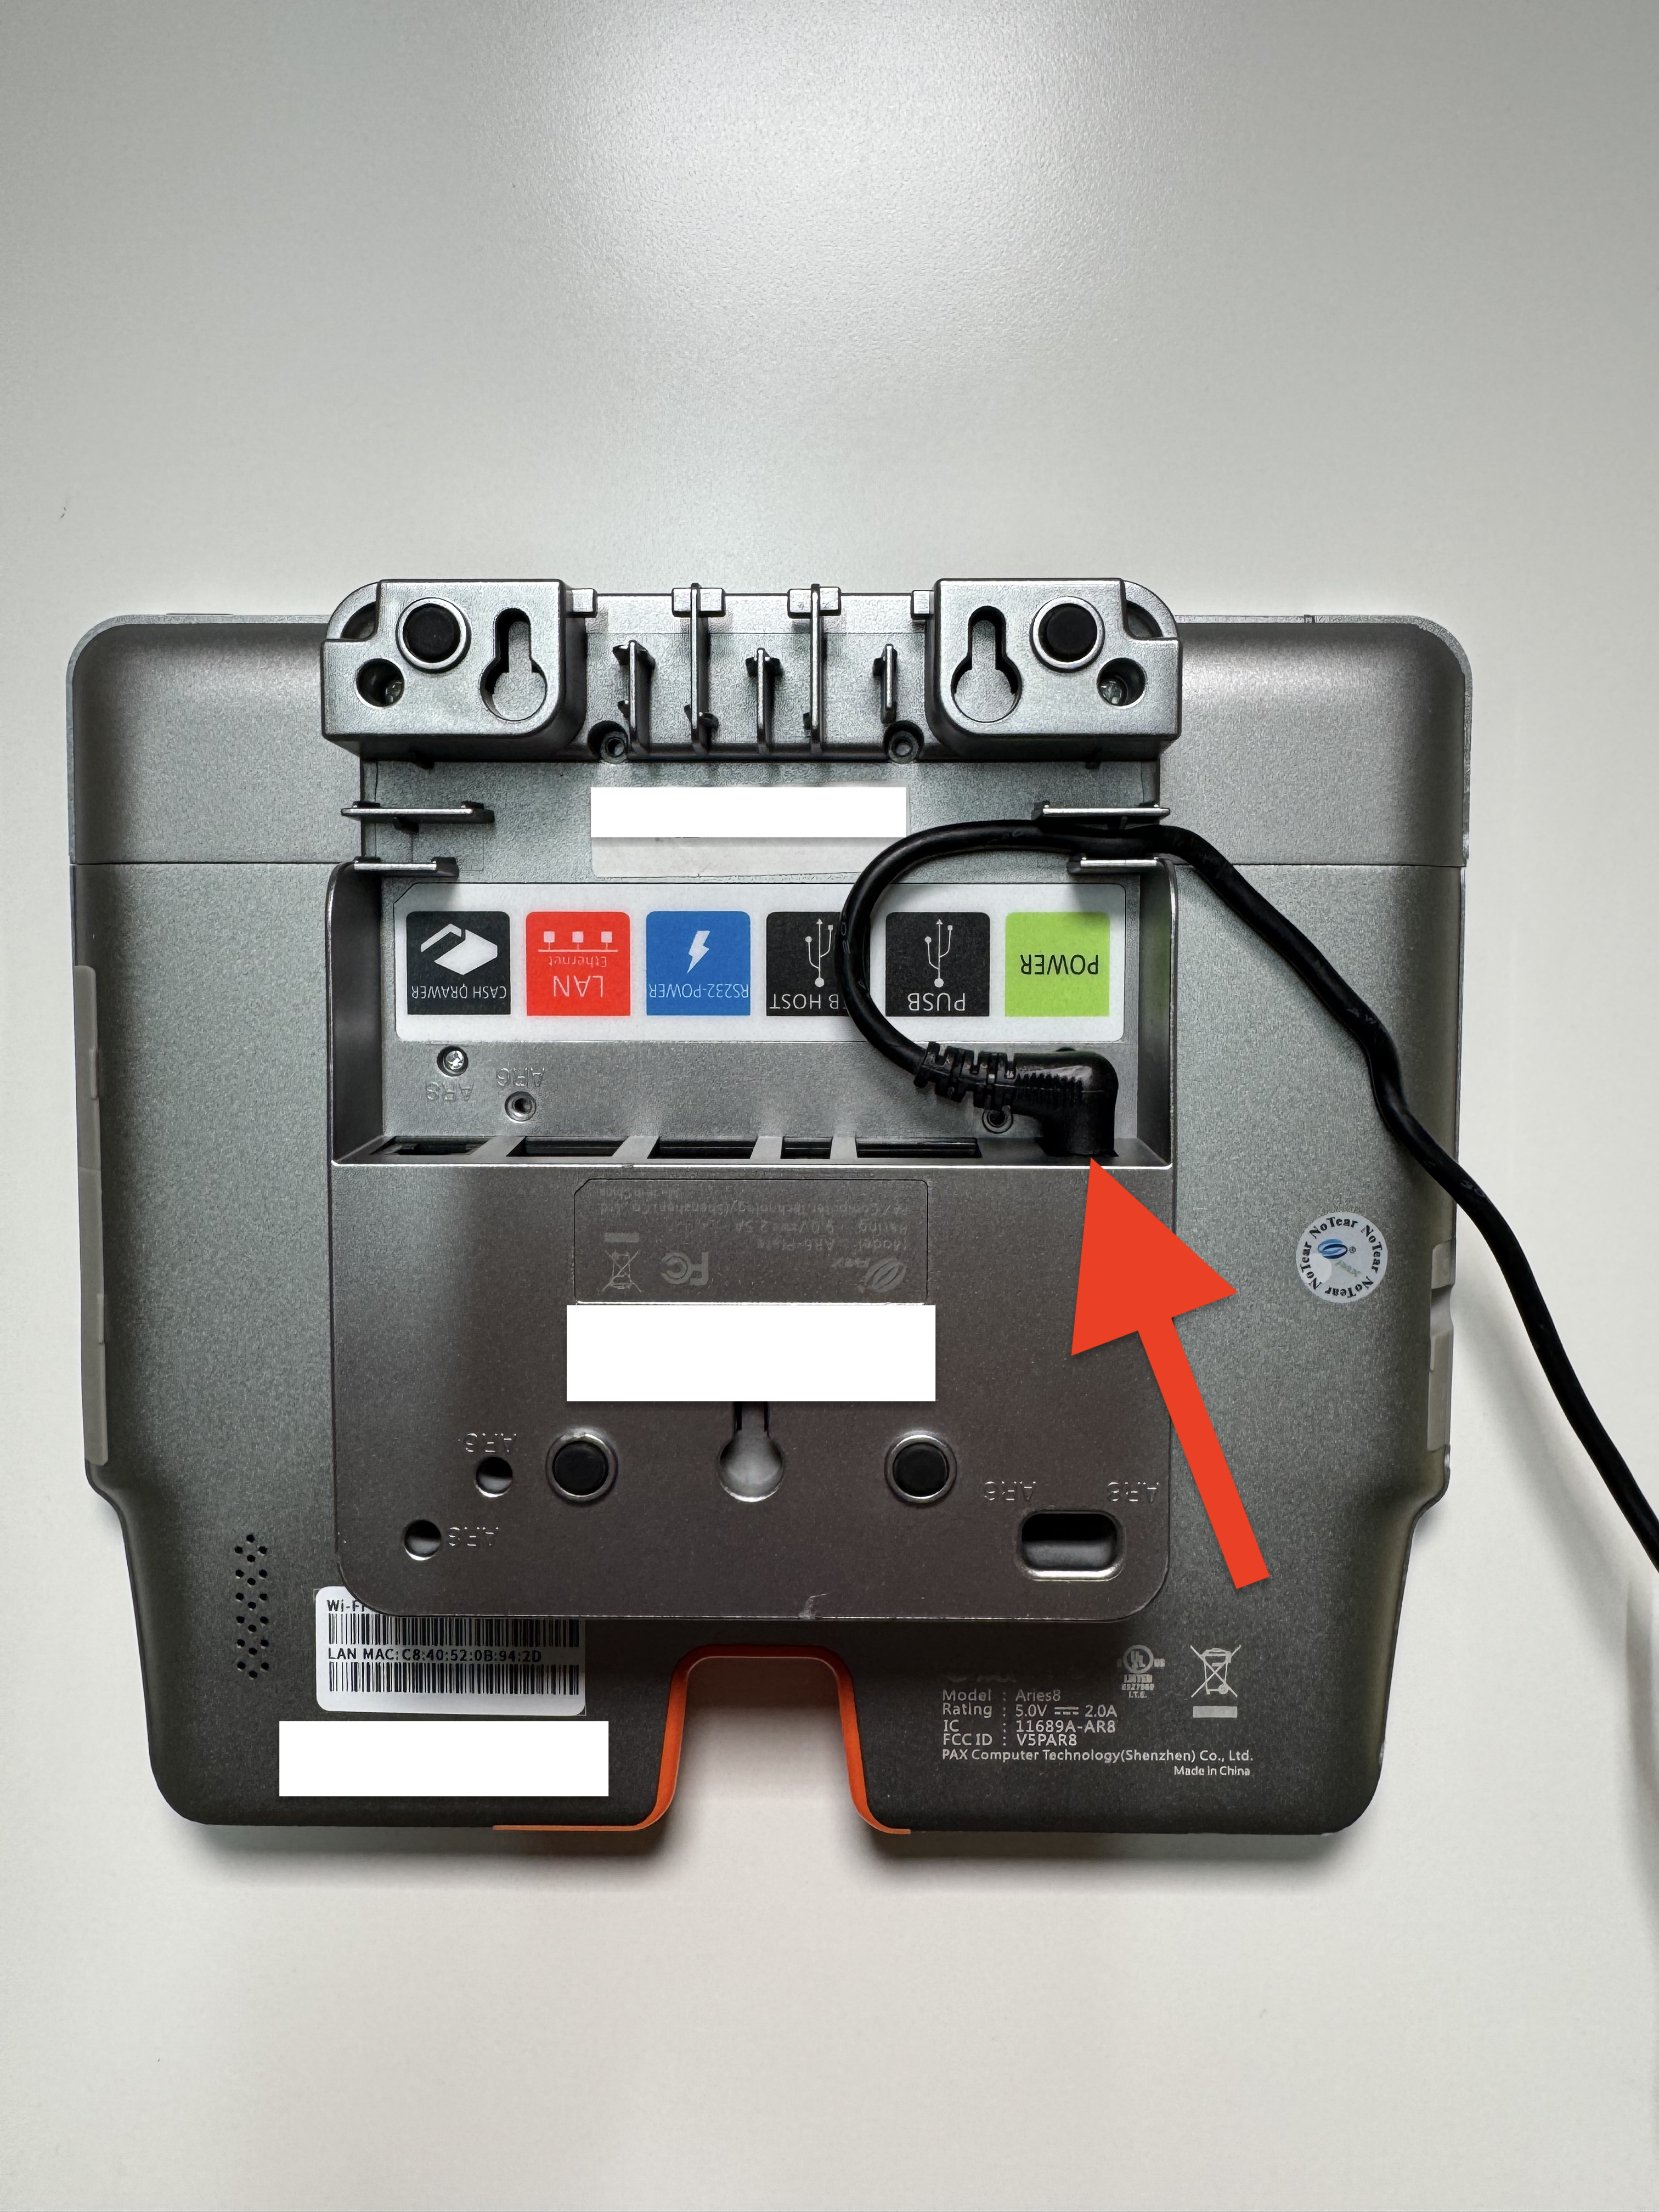
⚡ Important: Always connect the Pin Pad to a power source that remains constantly on.
If the power is interrupted, your daily batch may not close properly.
PAX A30 Power Cable Port
⚡ Important: Always connect the Pin Pad to a power source that remains constantly on.
If the power is interrupted, your daily batch may not close properly.
PAX A35 Power Cable Ports
⚡ Important: Always connect the Pin Pad to a power source that remains constantly on.
If the power is interrupted, your daily batch may not close properly.
4. Enable the Pin Pad from the Quickvee POS
Select Station Settings
Select Hardware
Select Configure Pin Pad
From the Drop Down Select "Ethernet"
Type in your Pin Pad's Serial Number Located on the Back of the Device
Select "Fetch Device Info"
Select "Save"
Select "Verify"
Once you select “Verify,” the message “PAX Device Connected” will appear if the connection is successful.
✅ After connecting the Pin Pad, it is recommended to run a $0.01 test transaction from the register screen to confirm everything is working properly.
Articles in this section
- Troubleshooting Your Quickvee Credit Card Terminal
- 🖨️ Supported Barcode Printers
- ✅ Confirm a Transaction on the Pin Pad
- 🏷️ Available Label Sizes for Printing in Quickvee
- 🔌 How to Connect my Pin Pad to the Quickvee POS
- 🤝 Pin Pad Troubleshooting
- 🌐 Switch the Pin Pad from Wi-Fi to Ethernet
- 🛜 Switch the Pin Pad from Ethernet to W-Fi
- 💤 How to Stop the Pin Pad from Sleeping
- 🔒What is my Pin Pad's Password