
The Attendance module in Quickvee POS lets employees clock in, clock out, take breaks, and view their attendance history — all directly from the POS tablet. Each employee uses their personal 4-digit passcode to record their time. Break types are configured by the merchant in Time Clock Settings.
Accessing the Attendance module
From the POS home screen, tap Attendance. The Clock In/Out popup appears immediately.
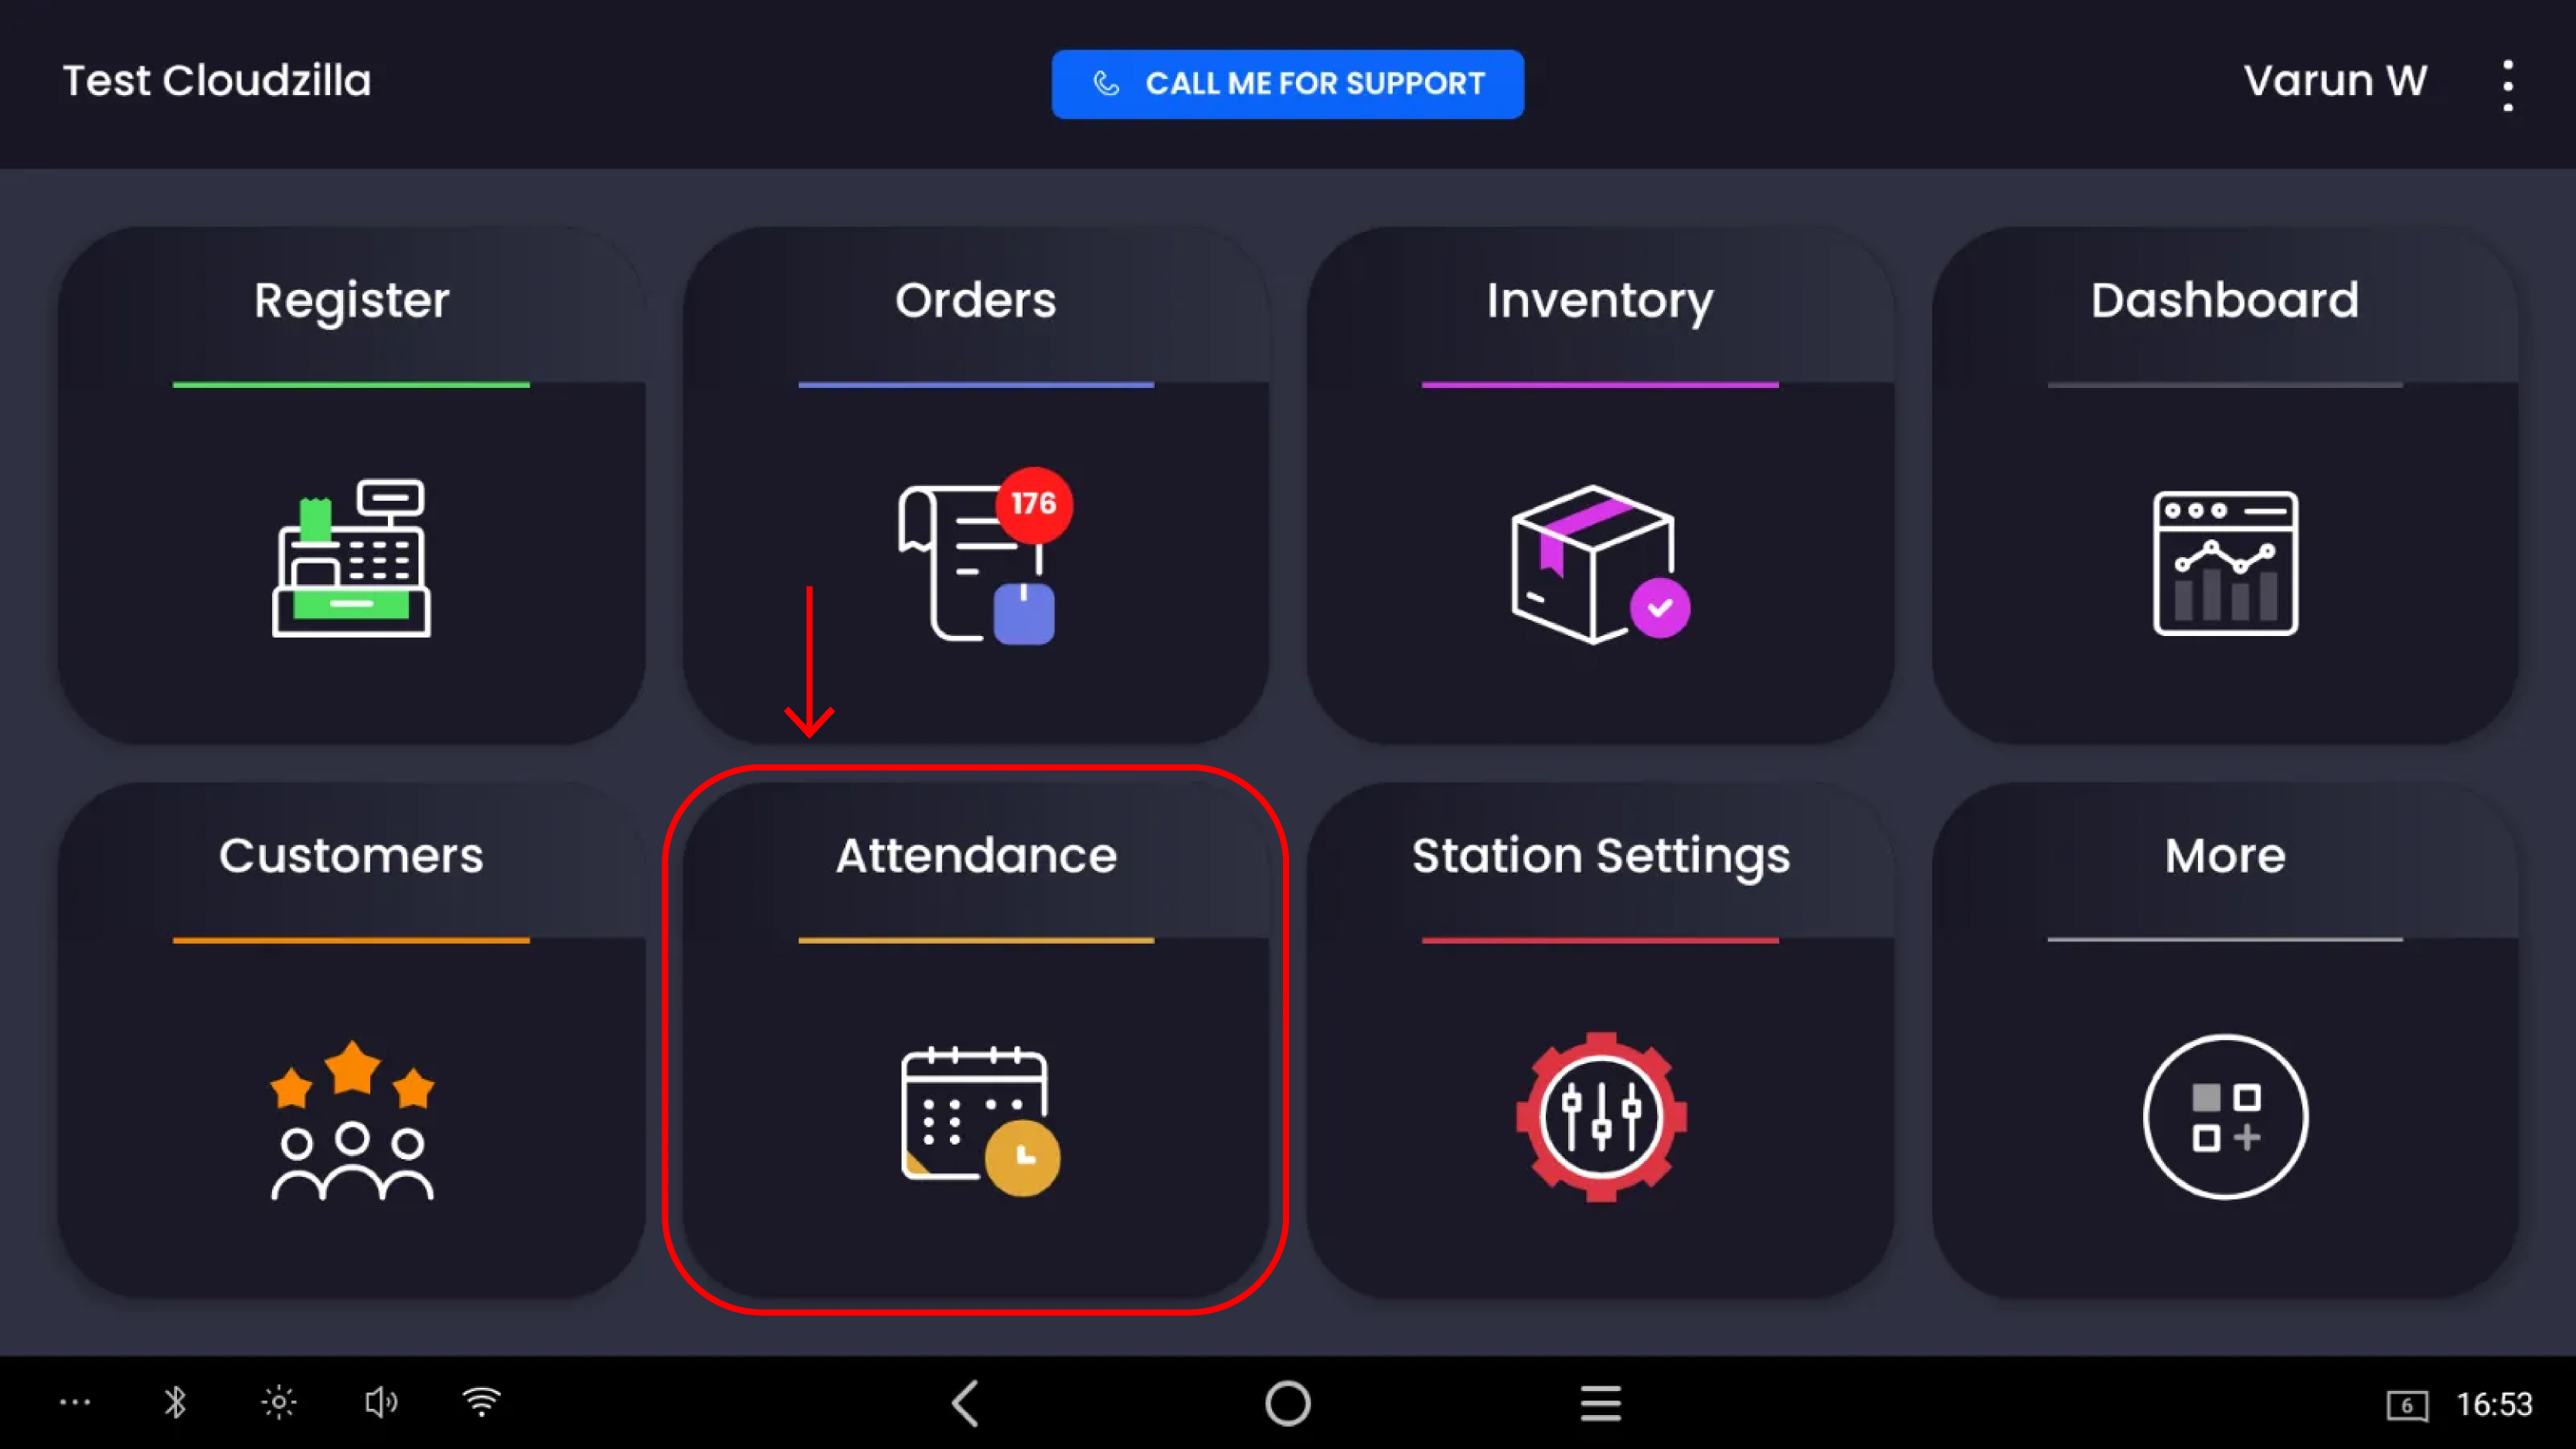
Step 1 — Enter employee passcode
A full-screen passcode entry screen appears:
-
The screen displays "Please Enter Passcode" with a 4-dot indicator
-
Each employee enters their personal 4-digit PIN using the on-screen numpad
-
Use the ⌫ backspace key to correct an entry
-
Tap ✕ (top-right) to cancel and return to the home screen
If an incorrect passcode is entered, a validation message is displayed. The employee must re-enter their correct PIN to proceed.
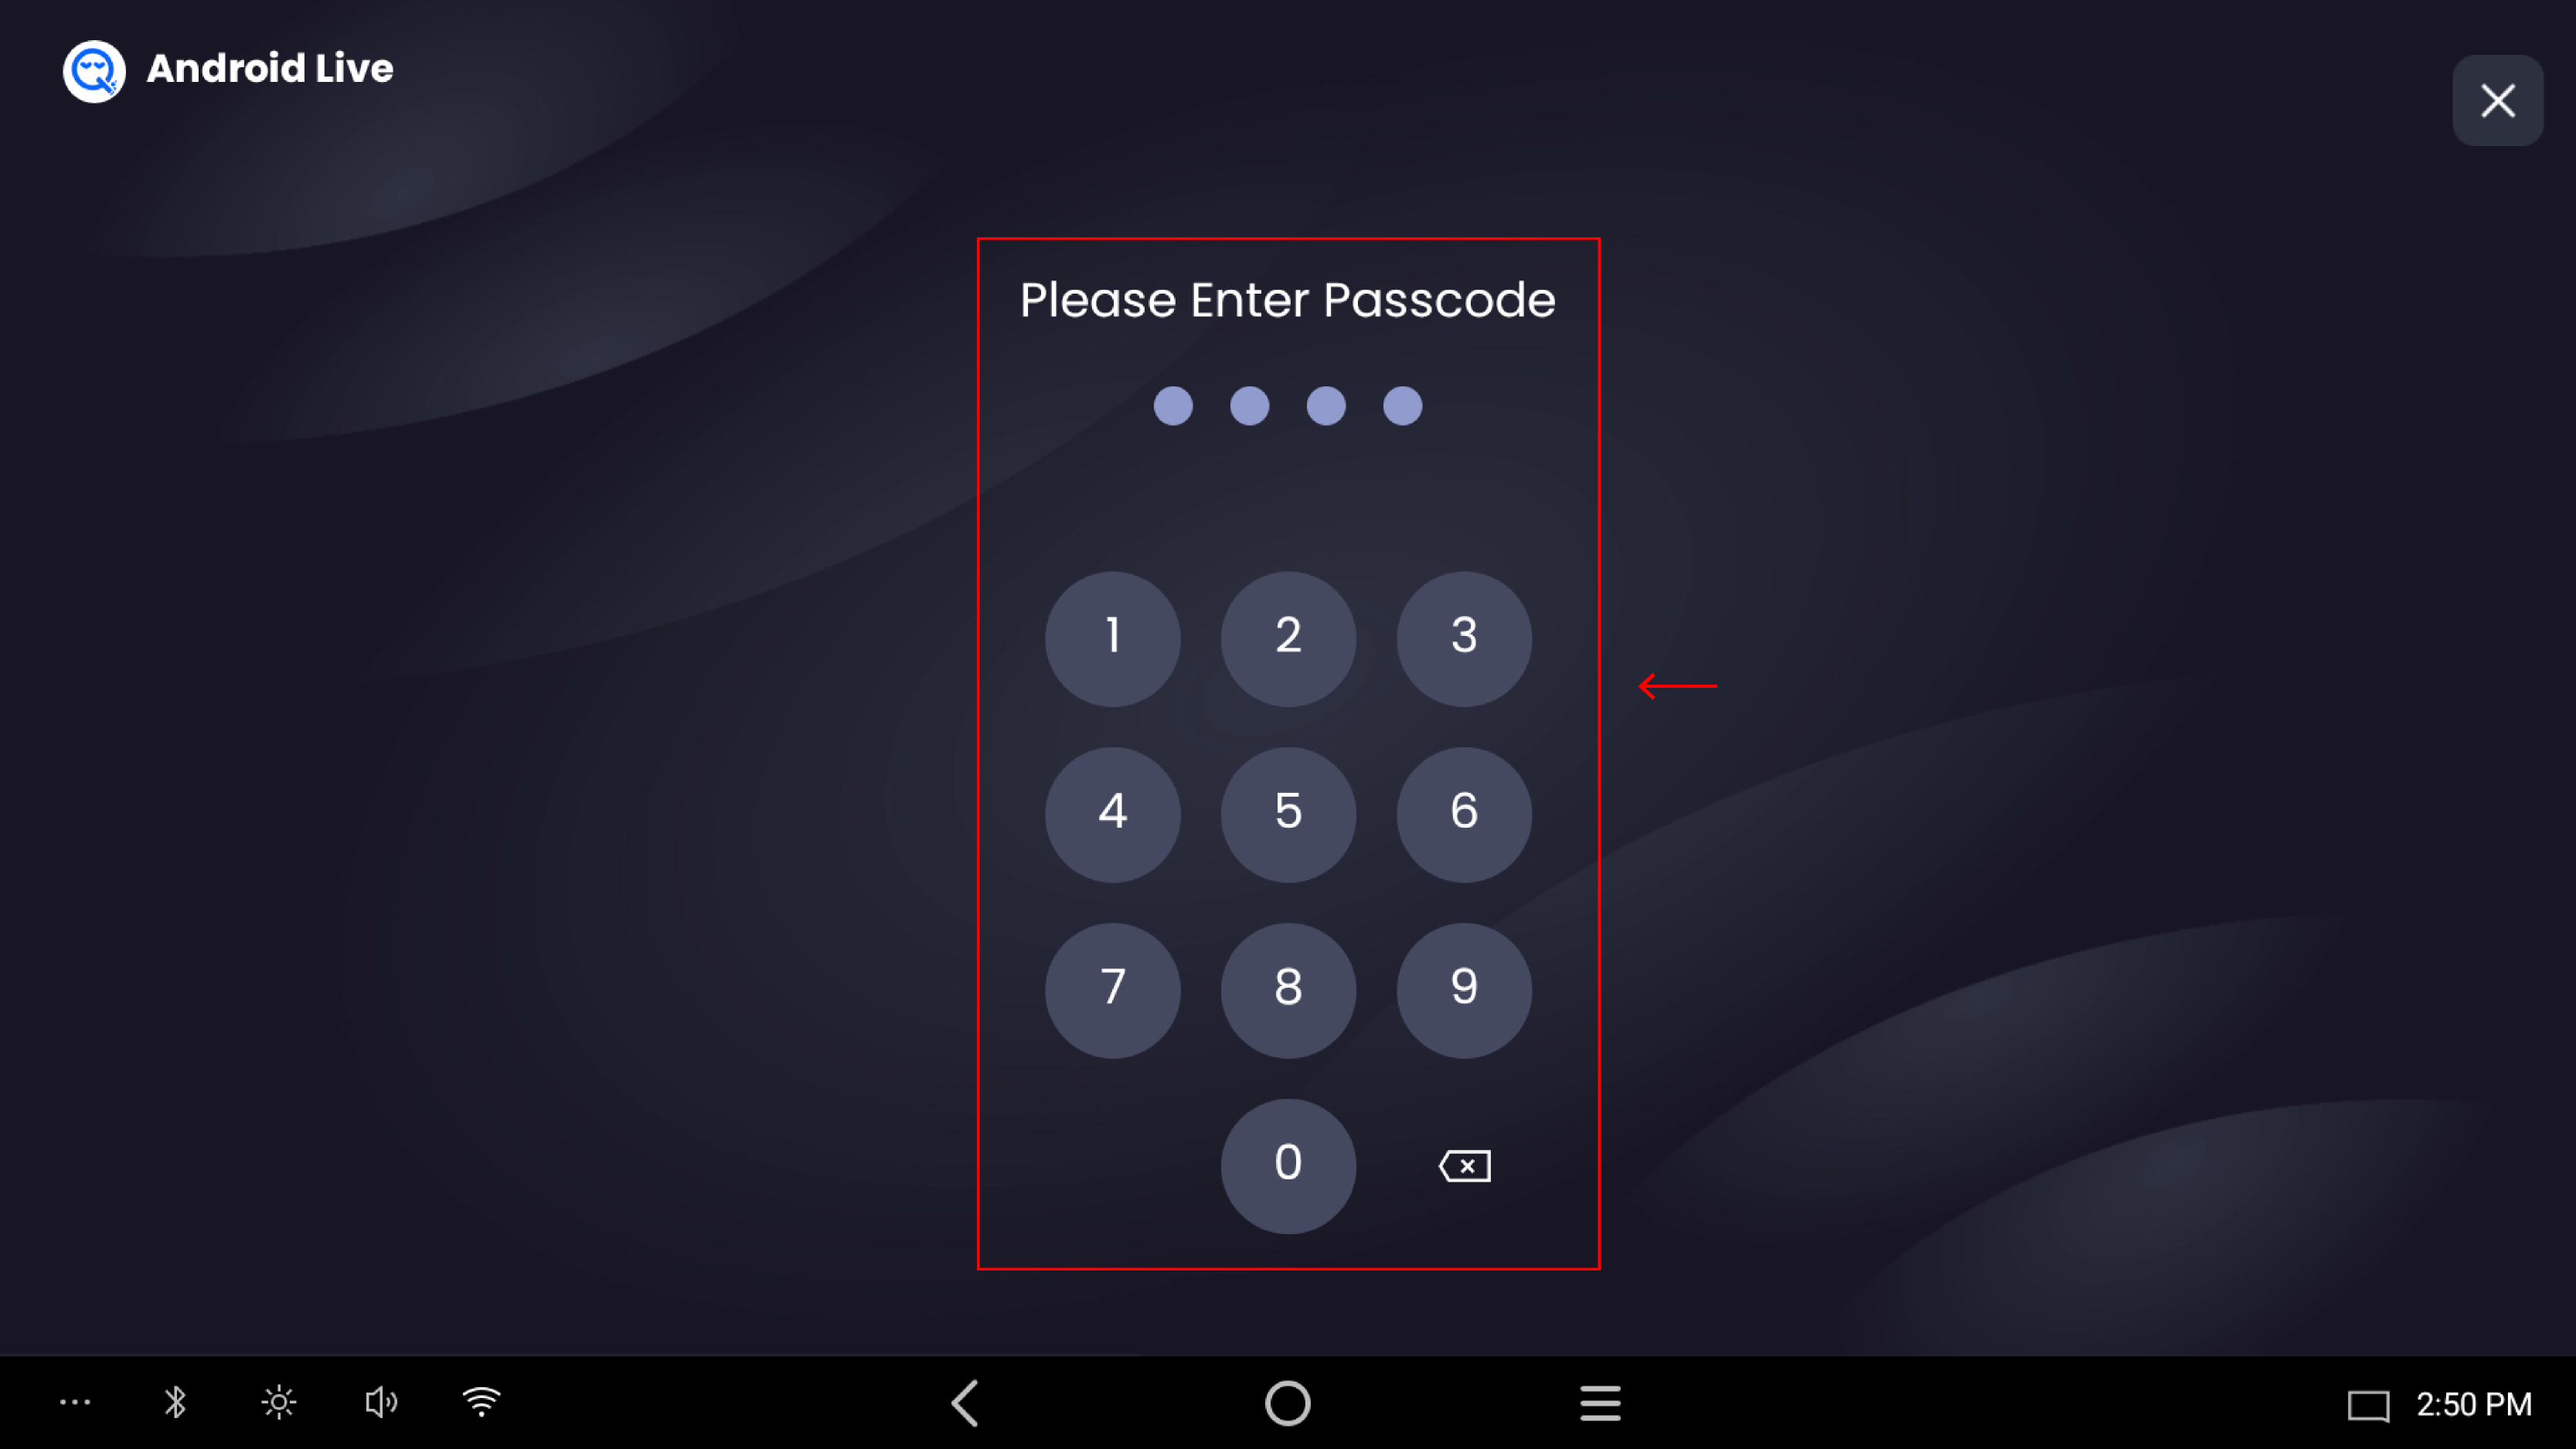
Step 2 — Clock In / Out panel
After a valid passcode is entered, the Clock In/Out popup appears with the subtitle "Track your work hours easily. View attendance history or clock in."
The panel displays the employee's last recorded action (check in or check out) with the exact date and time.
When clocked out — Clock In
-
Last check out — date and time of last clock-out (e.g. 16 APR 2026 02:49 AM)
-
A single green Clock In button
-
A View Attendance button
Tap the green Clock In button. The system records the clock-in time immediately and the panel updates to show the clocked-in state.
When clocked in — Clock Out or Start Break
-
Last check in — date and time of the clock-in
-
🟢 Clock Out — ends the employee's shift
-
🔴 Start Break — begins a paid break
-
View Attendance button
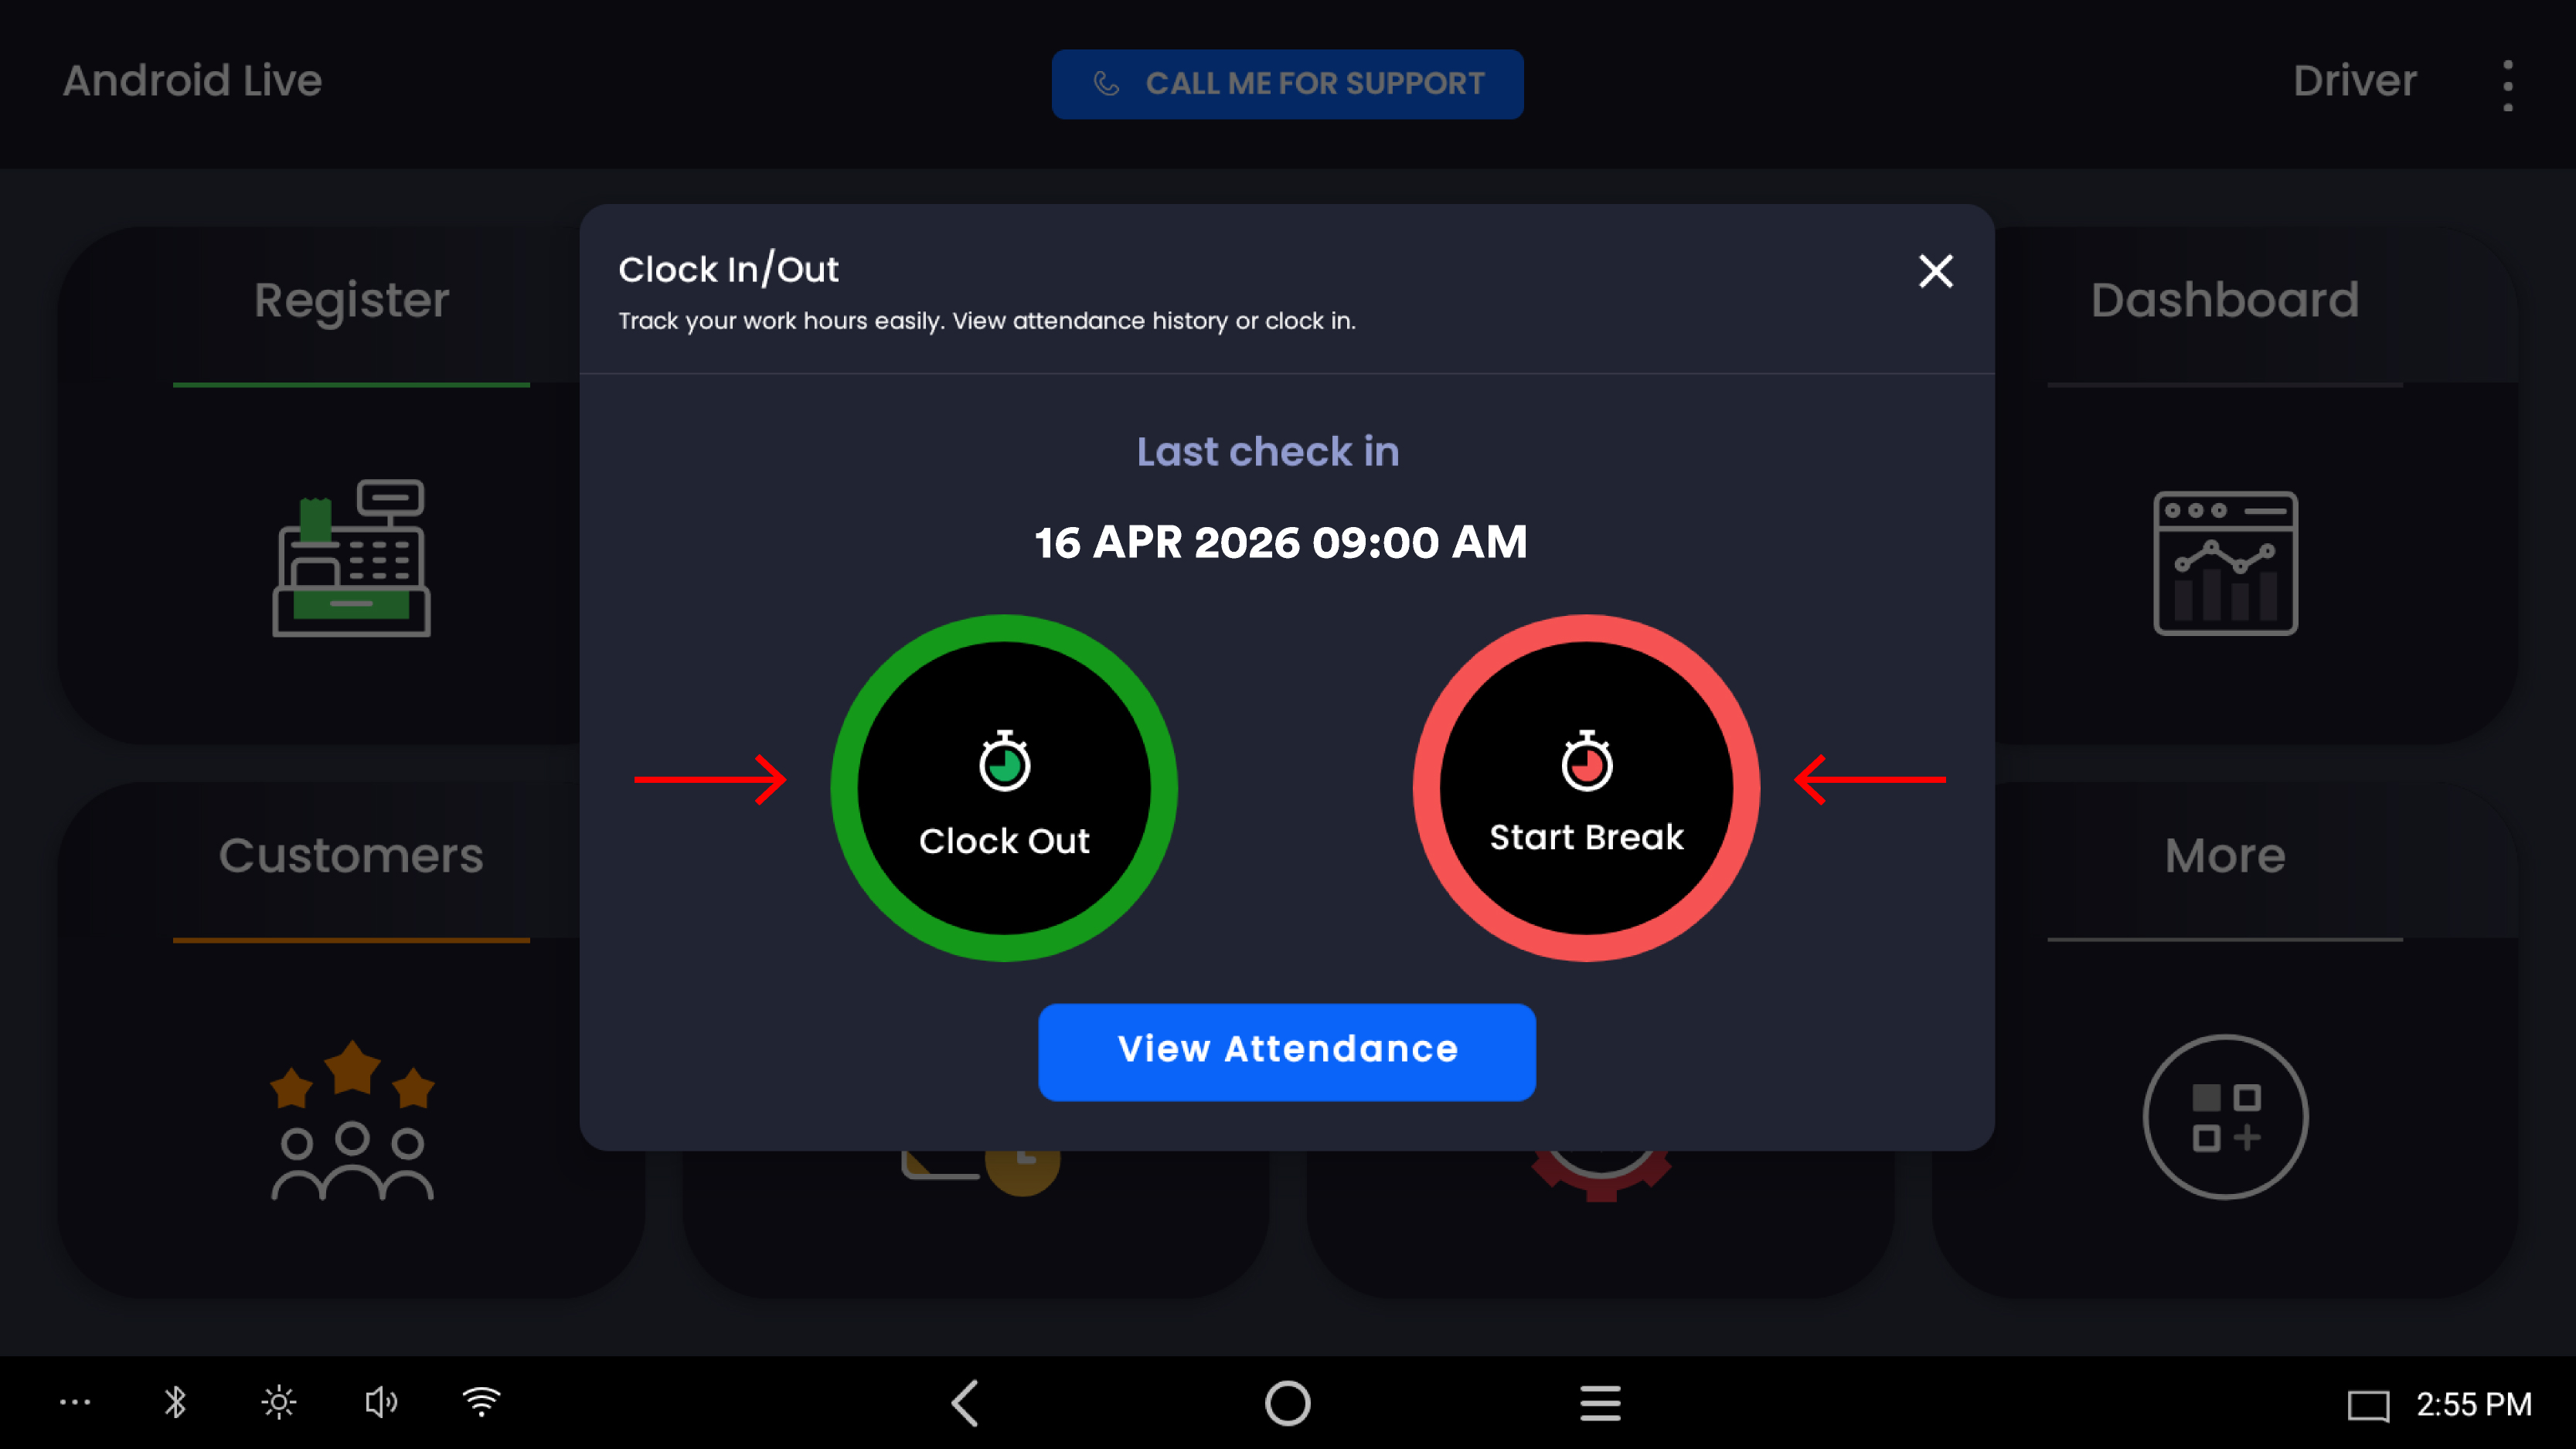
Taking a break
-
While clocked in, tap Start Break
-
The Select break popup appears with the configured break options (e.g. Take 15 min paid break, Take 30 min paid break)
-
Tap the desired break type to select it
-
Tap Done to confirm and start the break
-
Tap Dismiss to cancel without starting a break
Break types and paid break limits are configured by the merchant under Time Clock Settings in the back office. Only active break types appear in the list.
Clocking out
-
While clocked in, tap Clock Out
-
The system records the clock-out time
-
The panel returns to the clocked-out state showing the Last check out timestamp
If an employee forgets to clock out, a "Forgot to clock out" dialog appears on their next clock-in, prompting them to resolve the open shift before continuing.
Viewing attendance history
From the Clock In/Out panel, tap View Attendance to open the employee's personal attendance calendar.
|
Indicator |
Meaning |
|---|---|
|
Red background |
Absent — no clock-in recorded for that day |
|
Blue background |
Today's date |
|
Dark background |
Days with recorded attendance |
|
Total Hours Worked |
Per day, including paid lunch/break time (format: HH:MM:SS) |
-
Use the ← arrow to navigate to previous months
-
The calendar title shows the employee's name (e.g. "Abdullah Aziz's Attendance")
-
Each day cell shows Total Hours Worked including Paid lunch/break
📷 Add screenshot: Attendance calendar
Notes
-
Each employee must use their own 4-digit passcode — shared PINs are not permitted
-
Break types are configured in Time Clock Settings in the back office — inactive break types won't appear in the selection list
-
The attendance calendar is per-employee — employees can only view their own history from the POS
-
Full timesheet management, including editing time cards and reviewing pay periods, is available in the Timesheet module on the backend